Marvel Tōkon Lab Guide: Solving 4v4 Situations and Building Dirty Tag Synergies
Stop dropping matches and start labbing effectively. Learn how to use Marvel Tōkon's training mode to decode frame data, counter pressure, and discover wild tag synergies.
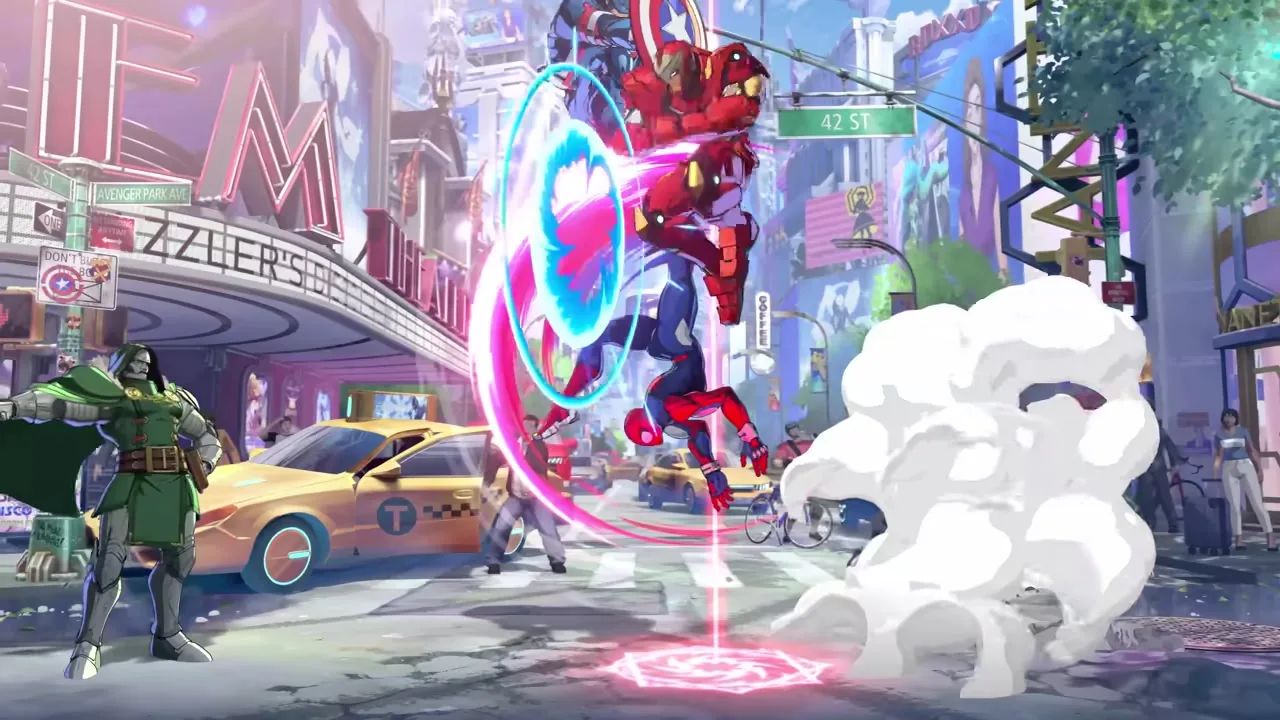
MARVEL Tōkon: Fighting Souls has been out in the wild for nearly two weeks, and the honeymoon phase is officially over. The initial chaos of the Evo 2026 announcements, the sweaty open beta weekends, and the frantic scramble to find the cheapest day-one damage are slowly fading in the rearview mirror. We are now entering the grim, glorious phase of any Arc System Works title: the labbing phase.
If you have been grinding ranked matches and finding yourself repeatedly put in a blender by organized Knights of Doom squads, simply throwing yourself back into the matchmaking queue will not fix your problems. Recent discussions among competitive players and outlets like ComicBook.com have even started suggesting that the game’s actual strongest character isn’t the one everyone expected during launch week. You might think Magneto or Magik are running the show based on early usage stats, but hidden tech and unoptimized assists are completely rewriting the matchup charts. The real monsters in the community are currently sitting in the lab, breaking the game apart piece by piece.
The harsh truth about 4v4 tag fighters is that muscle memory for your optimal damage routes will only take you so far. What separates decent players from the titans who will be taking top 8 at CEO next year is how they utilize training mode. It is not just a place to practice execution; it is a laboratory for dissecting scenarios. Recently, high-level players laid out a fantastic blueprint on the community subreddits for improving by focusing on a “solve this situation” methodology. Today, we are analyzing how to effectively use the training tools to stop getting clipped by nasty setups, and how to start developing your own terrifying team synergies.
The Anatomy of the Marvel Tōkon Training Room
Arc System Works has a pristine track record when it comes to feature-rich training environments, and Fighting Souls is absolutely no exception. The very first thing you need to do before you even think about queueing up again is adjust your Display Settings. By default, the UI is incredibly clean, heavily emphasizing the anime aesthetics and your team’s resources. But when you are in the lab, you need the raw mathematical truth.
Head into the Display Settings and immediately toggle on the “Frame Data” and “Invulnerability” options. You do not need to be a math major or memorize an exhaustive spreadsheet of plus-and-minus numbers, but you absolutely must understand the general rules of engagement. When an opponent’s heavy attack connects with your guard, are they at a frame advantage? Is it finally your turn to press a button, or are you walking into a deliberate frame trap? The frame data display gives you instant, color-coded visual confirmation of who is allowed to act next. Furthermore, the Invulnerability highlight is crucial for understanding the exact startup frames of invincible reversals and supers that consume your Skill Gauge.
Another heavily underutilized feature is the detailed Command List found in the Training Essentials tab. Far too many players simply memorize the motion inputs and ignore the property icons. Marvel Tōkon explicitly tags every single attack with its hit properties—specifically whether it hits high (overhead), low, or mid. When you are getting absolutely cooked by a relentless Peni Parker setup and you cannot figure out why your crouch block keeps failing, the Command List will show you exactly which singular hit of her string carries an overhead property.
The “Solve This Situation” Methodology
We have all experienced it. You match against a maniac running a Samurai Outriders composition, and Deadpool traps you in the corner with a sequence that feels entirely endless. Your shared Vital Gauge is melting away, and you have absolutely no idea when you are allowed to challenge the pressure. Instead of complaining about the balance of the roster on social media, the correct response is to go to the replay menu, write down the exact sequence, and take it to the training room.
The “solve this situation” methodology is about utilizing the dummy recording feature to playback that exact nightmare sequence. You record the dummy performing the string that just destroyed you online. Then, you stand there and practice blocking it. Once you can comfortably block the mixup without panicking, you start experimenting. Where are the microscopic gaps? Can you squeeze out a light jab to interrupt their rhythm? Do you need to spend a bar of your Skill Gauge for an invincible reversal, or can you rely on an active switch using your Assemble Gauge to bring in an armored assist?
This process is where the unique 4v4 tag mechanics of the game truly begin to shine. Because your team shares a single Vital Gauge, the decision to tag is never about saving a low-health character from dying; it is entirely about utility, screen positioning, and shifting momentum. When you record an opponent’s pressure string, try using different characters as your point character to defend against it. Does Captain America’s unique shield guard handle the blockstun better than Wolverine’s raw aggression? Can Storm use her aerial mobility to completely evade the mixup after a well-timed pushblock? You are not just learning how to block; you are mapping out the specific defensive profiles of your carefully chosen roster.
Offensive Synergy: The Iron Man / Green Goblin Nightmare
Labbing is not exclusively for defense. It is also the exact place where you discover setups that will make your opponents want to uninstall the game. Because the roster is locked at 20 characters across 5 designated teams (though you can happily mix and match any 4 characters you want), the permutations for assists using the Assemble Gauge are astronomically high.
A perfect example of community-driven lab work recently surfaced regarding a highly specific synergy between Iron Man and Green Goblin. On paper, these two might not seem like the most obvious pair—one is the stalwart anchor of the Fighting Avengers, the other a chaotic zoning threat from the Knights of Doom. But the tag system in this game allows for incredible, borderline broken creativity if you understand the physics engine.
The setup revolves around Iron Man’s flight state. Traditionally, when you have an opponent cornered, you want to keep them there at all costs. The corner restricts their movement and amplifies your pressure. However, Iron Man’s aerial movement and okizeme mixups are actually much more terrifying when there is physical space behind the opponent to allow for ambiguous cross-ups. If the opponent is plastered firmly against the invisible wall, they only have to block in one direction. The corner effectively neutralizes Tony Stark’s most dangerous mixup tools.
Enter Norman Osborn. According to competitive players, if you call Green Goblin using his back assist command while pressuring an opponent in the corner, the specific hit properties and knockback trajectory of Goblin’s glider swoop actually pull the defending opponent out of the corner slightly. It forcefully drags them back into the mid-screen space while keeping them entirely locked down in heavy blockstun.
This tiny spatial displacement is all Iron Man needs. With the opponent pulled off the wall but still trapped blocking the pumpkin bombs, Iron Man can immediately cancel into his flight mode and initiate a dirty, ambiguous left/right and high/low mixup. The opponent is abruptly forced to guess which side Iron Man is going to strike from, all while dealing with the visual chaos of Green Goblin leaving the screen. It is a brilliant, unconventional use of an assist: using it not for raw damage, but for microscopic screen-positioning adjustments to enable a specific character’s win condition. To fully grasp Tony Stark’s aerial dominance, check out our Iron Man breakdown, and for more on Norman Osborn’s chaotic utility, refer to our Green Goblin character guide.
Integrating Resources into the Blueprint
To truly execute these strategies in a real match, you must be deeply familiar with how the game’s specific resources interact. Your Assemble Gauge dictates the sheer frequency of these tag setups. Calling an assist like Green Goblin’s requires meter, and if the opponent manages to predict it, they can potentially snipe the assist character out of the air.
In most traditional team fighters, getting two characters caught in a combo—affectionately known as a Happy Birthday—means you lose an assist character’s health, but your point character might survive to fight another day. In MARVEL Tōkon: Fighting Souls, a Happy Birthday is an apocalyptic event. Because your entire four-character squad shares a single Vital Gauge, taking double damage from a careless assist call doesn’t just eliminate one roster slot; it immediately evaporates your entire team’s lifespan. This makes randomly pressing your Assemble Gauge a potentially match-losing habit.
Moreover, if the opponent recognizes your specific Iron Man/Green Goblin setup, their counter-play will likely involve aggressively spending their Skill Gauge. A well-timed super can blow through the entire setup, catching both Iron Man in his flight startup and Green Goblin during his assist recovery. This is why you must use the training room to record yourself doing your best setup, and then take control of the dummy to try and escape it. If you can break your own setup, your opponents at a tournament level will definitely be able to break it.
The Uncharted Territory of Episode Mode
While the competitive ranked grind is the main focus for many players, it is highly worth noting that applying these rigorous lab techniques can also drastically improve your experience in the single-player Episode Mode. The overarching villain, the Champion of the Universe, and the highly aggressive AI of the Knights of Doom faction are not bound by the same psychological weaknesses as human players.
The Champion of the Universe, in particular, possesses boss-specific attacks with massive, screen-filling hitboxes that will outright obliterate you if you try to simply mash buttons. Taking a few minutes to figure out the exact spacing required to bait out the Champion’s sweeping attacks, or determining which of your specific assists provides enough invulnerability to blow through his armor, turns a frustrating, credit-draining boss fight into a methodical execution.
Stop Pressing Buttons, Start Thinking
With the game fully launched, we are watching the meta develop at a blistering pace. Every single day, someone on social media posts a new ridiculous conversion or a seemingly inescapable four-way tag combo. While the community eagerly awaits the exact details of the confirmed Year 1 DLC—which will eventually add four more unannounced characters and a new stage—the tools provided in the base game’s training room are more than enough to keep you busy for hundreds of hours.
Stop throwing yourself at the ranked ladder when you are tilted. Take a breath, boot up the training environment, turn on your frame data, and start proactively answering the questions your opponents are asking you. Whether it is figuring out how to survive Magik’s relentless teleport pressure, learning the precise mechanics of the tag system, or mastering the fundamentals found in our combo basics guide, the answers to your ranked plateaus are all waiting to be found in the lab.